In a perfect world we would never need to water our gardens.
Either we would live in a climate that gets the perfect amount of water for the plants we want, or we would be able to use a system of swales to direct the rain water exactly where we need it to go.
Unfortunately, if you have a container garden, swales are not an option. With this in mind, you will probably end up needing to water your plants.
There are lots of methods that you can use to water your plants. You can utilize self-watering planters, you can utilize oyas, you can utilize a drip irrigation system, sprinklers, a hose, or, if you’re like me, you can use a good old fashioned watering can. No matter the method you use to water, you will still need the actual water. If you live in the city there is a good chance you will have to pay for your water and that water bill can get very high very quickly. This is where a rain barrel comes in.
In simple terms a rain barrel is a container that collects rain water. Usually, a rain barrel is made from a barrel (thus the name), but honestly you can make one out of anything you have laying around. Do you have a 5 gallon bucket? Instant mini-rain barrel. A plastic storage tote? That’ll work. An IBC tank? I’d call that a water tank not a barrel… but the concept is the same.
Side note: you can also buy a pre-fabricated rain barrel… but those go for $70+ and I would rather spend $16 and some time, so we’re going to ignore that option in this article.
No matter what type of container you choose to make your barrel, I suggest outfitting your rain barrel with a few key components. None of these are required, but they will make your life easier.
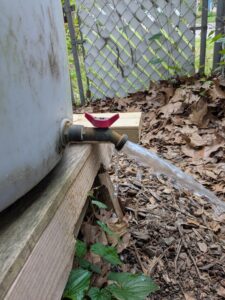
Spigot – If your barrel is larger than a 5 gallon bucket then you will save your back and your sanity by installing a spigot to the bottom of your barrel. The spigot can be hooked up to a hose or just left as is.
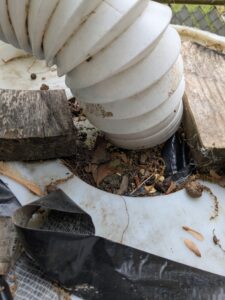
Screen Cover – A screen covering the surface of your barrel will prevent debris from accumulating within your water. This will keep the tank cleaner (less algae), keep your water from turning into a “tea” that could be acidic or basic, prevent debris from clogging your hose or watering can, and, as an added bonus, it will keep mosquitoes from making your water their personal daycare.
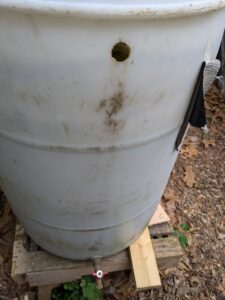
Overflow Hole – Just below your screen cover, drill a 1 inch hole to allow excess water to escape when your barrel is full. This will keep your cover from floating away, and, if you’d like, you can hook it up to a second barrel!
Spigot allows you to use water.Screen cover prevents debris from entering your water supply.An overflow hole keeps your barrel filled to the desired amount.
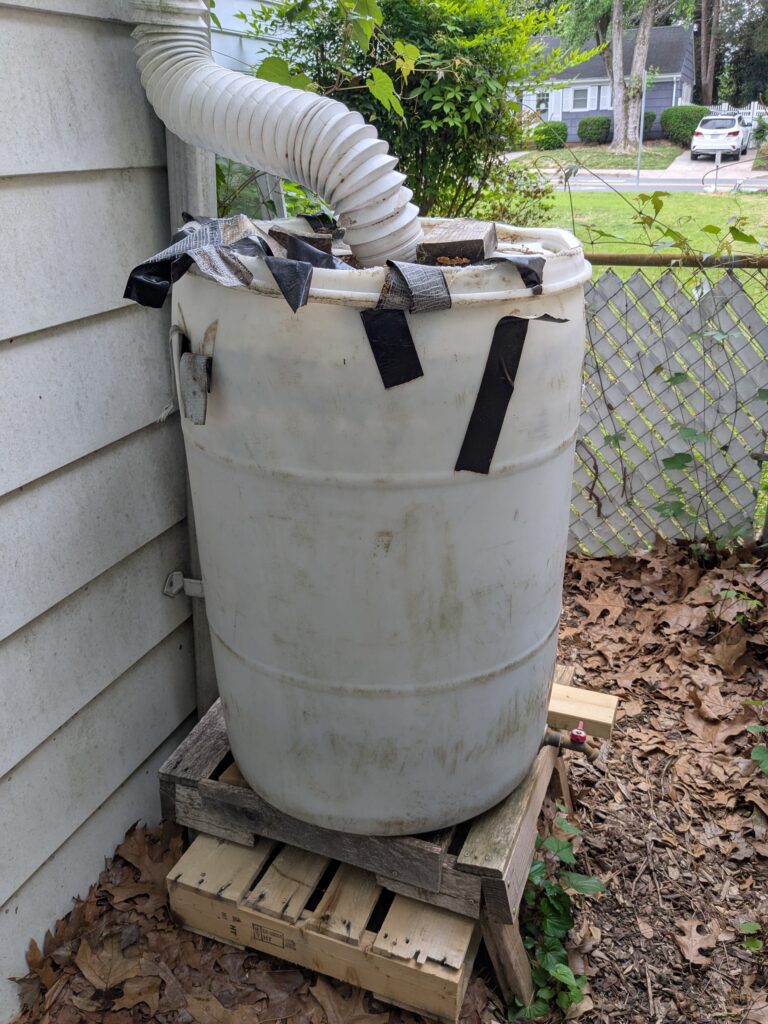
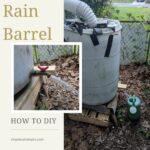
If you choose to include a spigot, which I really really really think you should, I also advise elevating your barrel. Elevating your barrel will make the spigot easier to get to and will also utilize gravity to increase your water pressure. I keep my rain barrel mounted on top of 3 small wood pallets.
Finally, the last real thing to consider when making a rain barrel is where you are going to put it. You want to find the perfect place before you set it up because it will be really heavy when it’s full of rain!
If you have a small garden close to the house I highly recommend setting up your rain barrel beneath your gutter downspout. This system will collect the most rain water in the shortest amount of time because it turns out a lot of water hits your roof, even if you only get a light rain shower.
If your garden is farther from the house you have three options:
Is the garden close to an outbuilding? Take advantage of the water that flows off that roof!
Get a long hose. This will work better with a larger tank because you will lose water pressure the farther you get from the reservoir.
Just set up your rain barrel in your garden. You won’t collect water nearly as quickly if you are relying solely on the water that hits the lid of your container but you’ll still be collecting water! If you increase the surface area of the lid of your container that will increase the amount of water you collect.
Have I convinced you? Will you add a rain barrel to your garden this year?
DIY rain water collection reservoir that you can use to water your garden!
Total Time30 minutesmins
Equipment
Drill
1 inch hole saw (may need another size based on spigot)
Saw
Wrench (size dependent on spigot)
Materials
55 gallon barrel(or any other container)
Rain barrel spigot
Screen
Zip Ties/Screws/Duct Tape(to connect screen to barrel)
Instructions
Read the installation instructions for your spigot! Don't just f around and find out on this one. Different spigots require different sized holes. In addition to that, some spigots require an inner and outer component. You don't want to cut the top off of your barrel if you don't have to.
If your spigot requires you to tighten a nut on the inside and your barrel is an actual barrel without a lid, cut off the top of your barrel. This cut portion is now your "lid." If your "barrel" has a real lid you can just remove the lid. If your spigot does not have an internal component, don't cut off the top of your barrel!
Drill the specified size hole about 1 inch from the bottom of your barrel. This is where you will install the spigot. For me, this hole was 1 inch in diameter.
Install your spigot. For me, this involved two pieces that screwed into each other. One on the outside of the barrel and one on the inside of the barrel.
Drill a 1 inch hole about 2 inches from the top of your barrel. This is your overflow drain. If you'd like, you can put a second spigot here with a hose and connect it to another barrel.
Cut out the center of your lid (or the top of your barrel if you didn't have to cut off the top) and then attach the screen to this hole with your fastener of choice (zip ties/duct tape/screws).
Put the "lid" back on your barrel and secure with duct tape.
Place your barrel under your downspout!
Pro-Tip: Stack small pallets, bricks, pavers or cinder blocks beneath your barrel to elevate it and make the spigot more accessible.
Notes
My rain barrel cost me $16. I got the barrel for free from someone who was throwing it out, the spigot cost me $15 on Amazon and for the screen I used an oil splatter screen from the dollar store.
I am an Amazon Associate and that is reflected in the below affiliate links. I will make a small commission if you purchase the below books with my affiliate link. That being said, please check your local or favorite indie book store for them!I’d much rather you support a small business than give me a kick-back.